Sentinel-2 Photoshop Tutorial
As we have seen in last two examples, the premade True Color Images are convenient to obtain, and you can easily adjust them to create acceptable results. However, they have an Achilles heel: snow- and ice-covered landscapes. Automated processing removes the very lightest tones, rendering them as empty white (Figure 12, left). In order to depict subtle details in snowy terrain, one must build the satellite image from scratch using the raw data in bands 4, 3, and 2 (Figure 12, right).
Image creation: Queenstown
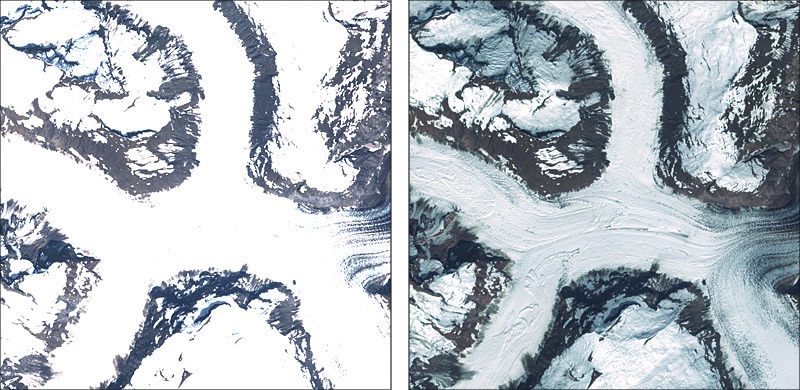
Figure 12. Johns Hopkins Glacier, Alaska. (left) True Color Image. (right) Custom-produced image .
For this example, we will build an image from scratch centered on Queenstown, New Zealand, located on the north shore of Lake Wakatipu. The right side of the image includes The Remarkables, the snow-covered range trending north-south (Figure 13).
Procedure
1) Use Geographic Imager to open bands 4, 3, and 2 (File/Import/GI: Advanced Import...). The import will take a couple of minutes to complete, and the three bands will open as separate Photoshop files.
2) With one of the Photoshop files active, go to the flyout menu in the upper right corner of the Channels window. Select Merge Channels...
3) In Merge Channels window, change the mode to RGB Color and specify 3 channels.
4) Another window will pop up. Make sure that band 4 is the red channel, band 3 is the green channel, and band 2 is the blue channel. Then click okay.
5) Photoshop will then ask whether you want to save each of three bands. Don't save them. You will then see the merged 16-bit RGB image, which is mostly gray.
6) Now the fun begins. Apply a Curves adjustment layer and adjust the tonal range of the image taking care to leave some value in the snow patches. I often apply two or more Curves adjustment layers, one on top of the other, to fine-tune the tonal balance. With 16-bit images, you can stretch the tonal range without worrying about banding artifacts.
The image in Figure 13 is the result of the above procedure. Next, I jazzed it up by brightening the vegetation and tinting the water blue (Figure 14). I describe these techniques fully in the Friday Harbor example.
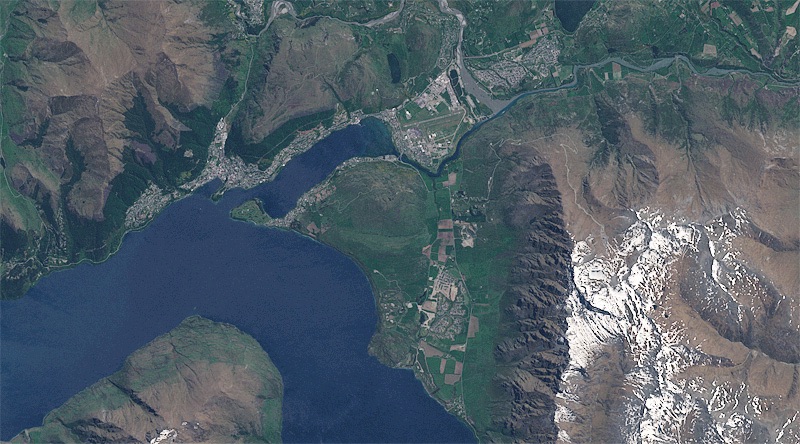
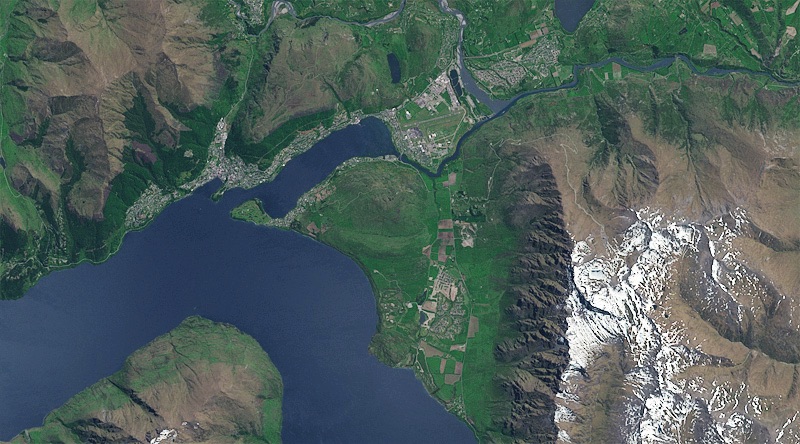
Figure 13. Custom image of Queenstown, New Zealand, produced from bands 4 ,3, and 2.
Figure 14. The Queenstown image with vegetation and water enhancements.
Finishing up
Before exporting the final image as a GeoTIFF using Geographic Imager, go to Image/Mode and reduce the bit depth from 16 to 8 bits per channel, and then flatten the image. This will significantly reduce the file size.
The very last thing that I do is to apply sharpening, which is irreversible. You will need to experiment to determine the amount that is best. As a starting point, try these settings (Filter/Sharpen/Unsharp Mask):
Amount = 100%, Radius = 0.5 pixels, Threshold = 0 levels
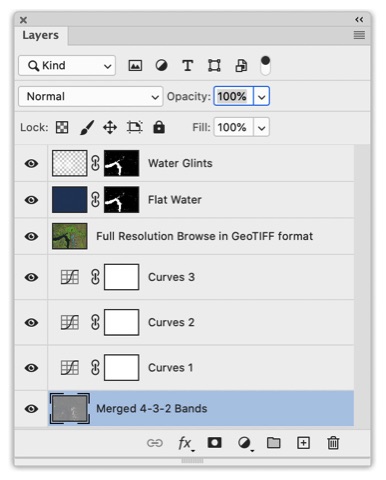
The layers used to produce the final Queenstown image.
Click here to download the Photoshop file (114.3 MB)