 |
|||||||||||
Landsat 8 Photoshop Tutorial |
|||||||||||
Mosaics |
|||||||||||
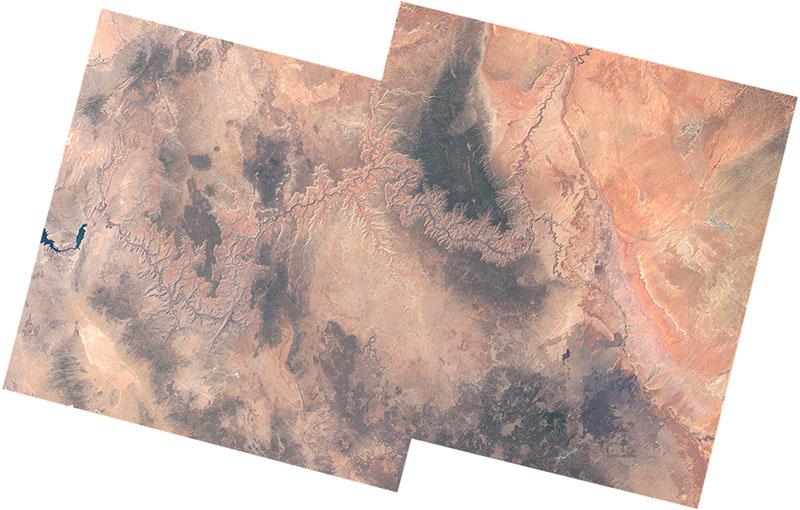
Often you will discover that a single Landsat 8 image does not cover a large enough area. Or, your area of interest is where two or more images overlap. Or, clouds may cover part of your image requiring patching with supplemental images of the same place taken on different dates. The solution to all of these problems is creating an image mosaic (Figure 19). |
|||||||||||
 |
|||||||||||
Figure 19. Showing all of the Grand Canyon requires two Landsat 8 images. |
|||||||||||
Landsat 8 images have generous amounts of overlap with adjacent images on all four sides. Below you will find two procedures for creating mosaics. Manual procedure 1) Open the two Landsat 8 scenes you want to mosaic. 2) Select one of the images and use Canvas Size (Image/Canvas Size) to expand the width or height by 200 percent to make room for the image you will add to it. 3) On the second image, use the Magic Wand Tool to select all of the black fill or "collar" that surrounds the image. 4) Inverse the selection (Inverse/Selection) so that only the satellite image is selected. Copy and paste this on the first image that you expanded in size. The pasted image should be the top layer. 5) Temporarily change the blending mode of the top layer to multiply so that you can simultaneously see details on both the top and bottom images. With the move tool slide the top image over the bottom image until the details align in the areas where they overlap. Zooming in close and nudging in one-pixel increments with the cursor keys helps for final positioning. Note: If the images are in different UTM zones, you also will need to rotate the pasted image in order for it to align. Determining the right amount of rotation will take time and experimentation. 6) Change the blending mode back to normal. Place a layer mask on the top image and paint on it with a soft brush to eliminate any hard seams. Geographic Imager procedure 1) Open two or more images that you wish to mosaic. 2) Use the mosaicking feature in the Geographic Imager plug-in (File/Automate/Geographic Imager/Mosaic) to automatically create the mosaic. Be sure to the have the "Keep source data on separate layers" box checked so that each of the Landsat images becomes separate layers. Doing this allows you to delete the black collars from the mosaicked Landsat images. |
|||||||||||
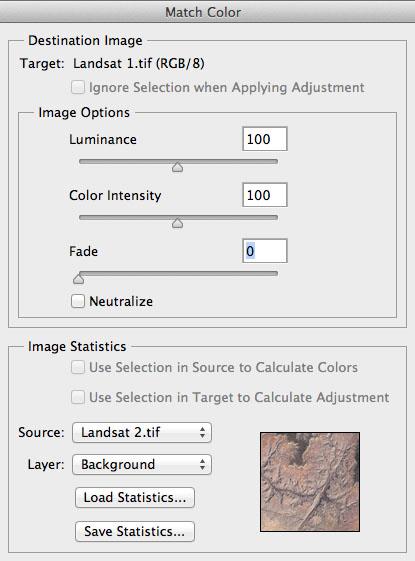
Tip – Match Color Despite your efforts, you may still see discordant color differences when you place two or more Landsat images side-by-side in a mosaic. For example, one image may be lighter than the other or less saturated. You can correct localized tonal differences in small areas by painting with a large soft brush using the Dodge and Burn tools. For large color differences between images, a Match Color adjustment (Image/Adjustments/Match Color) may be the answer (Figure 20). Match Color functions just as its name suggests: you can automatically match the color of one open image to that of a second open image, or vice versa. It also allows you to match color between layers in an image and it takes into account selected areas on layers. This is useful if you want to exclude part of an image—for exmple, a solitary snow-capped peak rising above arid lowlands—when applying color adjustments. Procedure 1) Open two Landsat scenes. Make the scene you want to adjust the active or "Target" file. 2) Open the Match Color dialog (Image/Adjustments/Match Color). 3) For the "Source" choose the other open image and click OK. The color of the target file will then automatically take on the characteristics of the source file. |
|||||||||||
 |
|||||||||||
Figure 20. Matching color between two Landsat 8 images. |
|||||||||||