Terrain Texture Shader

Software for Enhancing Shaded Relief on Maps

Tom Patterson

Terrain Texture Shader is an inexpensive Mac application developed by Natural Graphics that reads digital elevation models (DEMs) and renders them as images with increased contrast and detail (Figure 1). The basis for the software is an algorithm developed by Leland Brown and presented at the 2010 NACIS conference. A command-line application (it runs on Mac and Windows) written by Brown was the only way to create texture shading up until now.

moab1

Figure 1. (left) Grayscale DEM of canyon country near Moab, Utah. (right) Texture shading.

Brown originally envisioned texture shading as a stand-alone terrain presentation technique serving as an alternative to conventional shaded relief, which he found lacking in highly eroded landscapes. The problem with texture shading by itself, however, is that it looks nothing like the terrain we are accustomed to seeing on maps, and the dark tones interfere with other map information, such as labels. A more practical use of texture shading is for mapmakers to merge it with shaded relief. The two techniques when combined can improve many terrains, clearly depicting drainages, revealing small details, and enhancing three-dimensionality (Figure 2).

moab2

Figure 2. (left) Shaded relief. (right) Shaded relief merged with texture shading.

Using Texture Terrain Shader

The user interface of Terrain Texture Shader (TTS) is similar to Natural Scene Designer Pro, the flagship terrain presentation software also published by Natural Graphics. TTS imports a variety of elevation data formats and opens Natural Scene Designer files.

Once elevation data are loaded in TTS, tools are available in the “Terrain” drop menu to smooth, clip, and reproject the terrain. The “Render” drop menu accesses the dialog for rendering a texture shade (Figure 3).

TTS

Figure 3. Render dialog, Terrain Texture Shader.

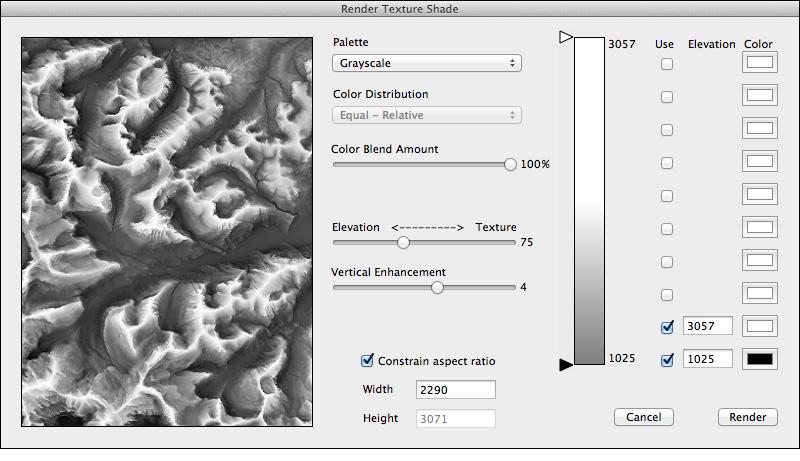
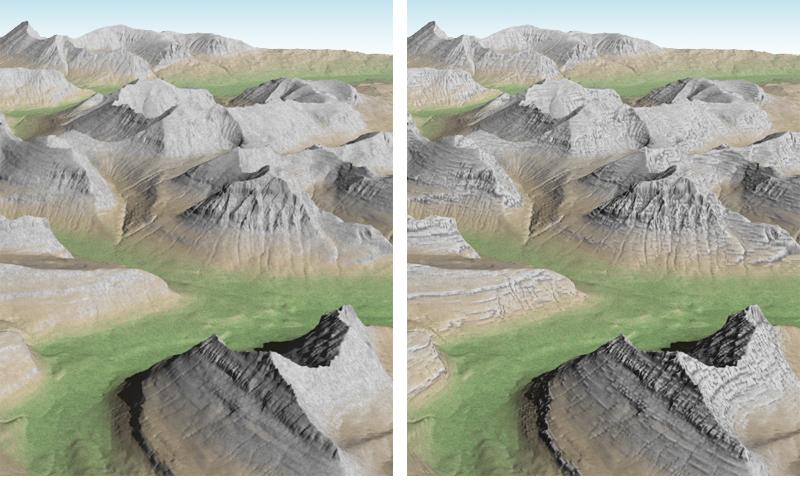
The Elevation/Texture and Vertical Enhancement sliders are the main controls. Moving the Elevation/Texture slider to the right increases the amount of texture shading and moving it to the left increases the amount of elevation data that appear in the rendered image. Moving the Vertical Enhancement slider from left to right increases the apparent contrast in the image.

Set the width and height to match the size of shaded relief image you will be combining with the texture shade. Doing this allows you to copy and paste images from one file to another in Photoshop. TTS saves rendered images as GeoTIFFs, useful for working with a GIS.

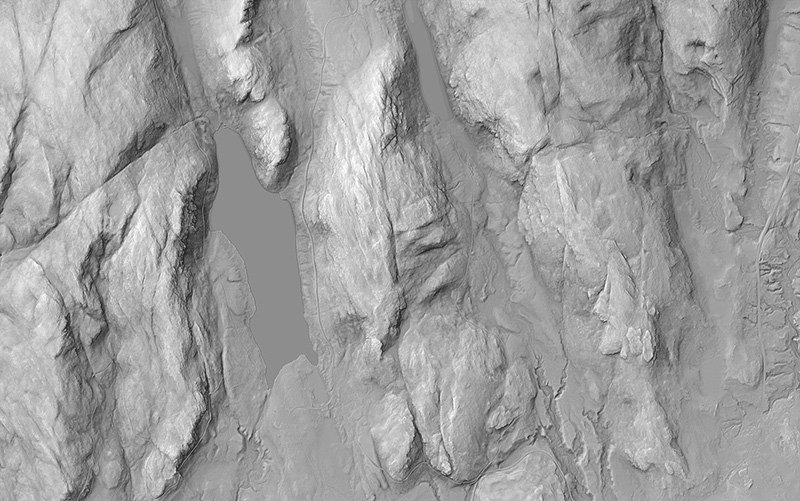
The default TTS render settings are a good place to start for your first texture shading. I also recommend rendering several others at different settings to give you design options later when working in Photoshop. Try moving the top slider right to 100 or 150. Render again and save the image. Next, move the bottom slider left to 2 or 3. Be sure to save the renderings with new names that you can easily identify.

Photoshop compositing

The real magic of texture shading happens in Photoshop.

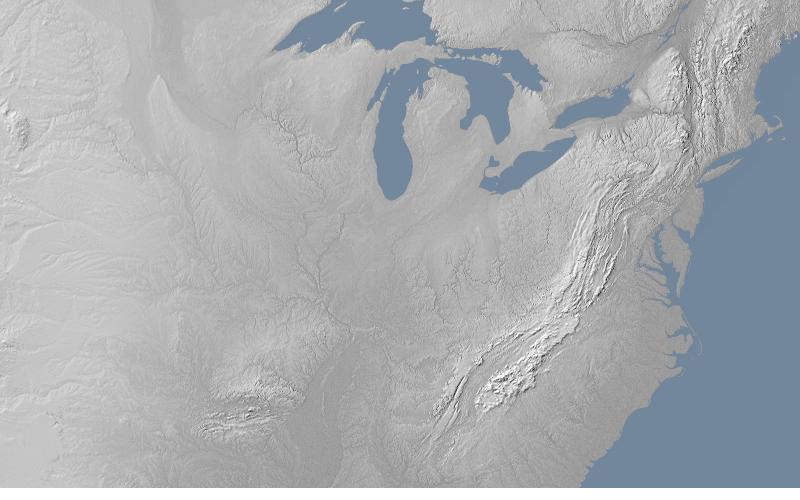
1) Open your texture shading and the shaded relief you will combine with it. Copy and paste the shaded relief on a layer above the texture shading.

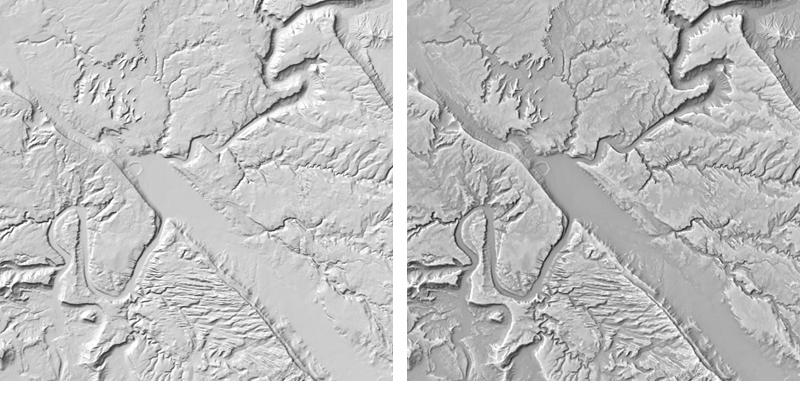
2) With the blending mode of the shaded relief layer set to the default "Normal," reduce the layer opacity allowing the texture shading below to show through. In general, setting the shaded relief layer opacity between 50 and 80 percent works well for most terrains.

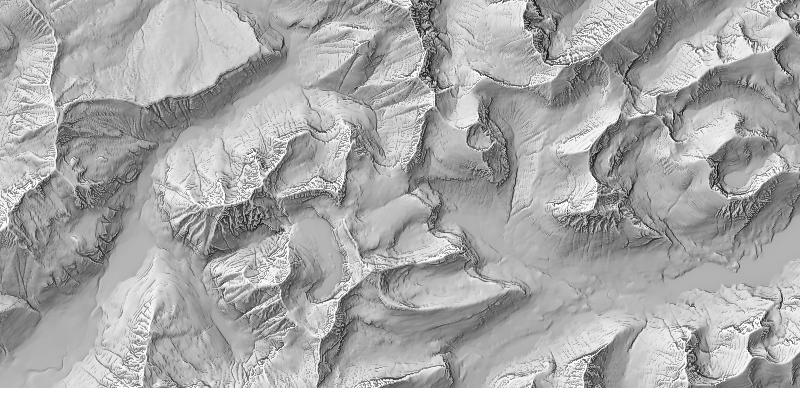
3) When the shaded relief layer opacity is closer to 50 percent, it may be necessary to add supplemental relief shadows. Follow this procedure:

– Duplicate the shaded relief layer and set the opacity of the duplicated layer to 100 percent.

– Use a curves adjustment to remove all value from flat areas, such as water bodies. Do this by sliding the highlight end of the curves adjustment horizontally until flat areas appear completely white.

– Set the layer blending mode to "Multiply" and reduce the opacity considerably until the relief shadows look pleasing.

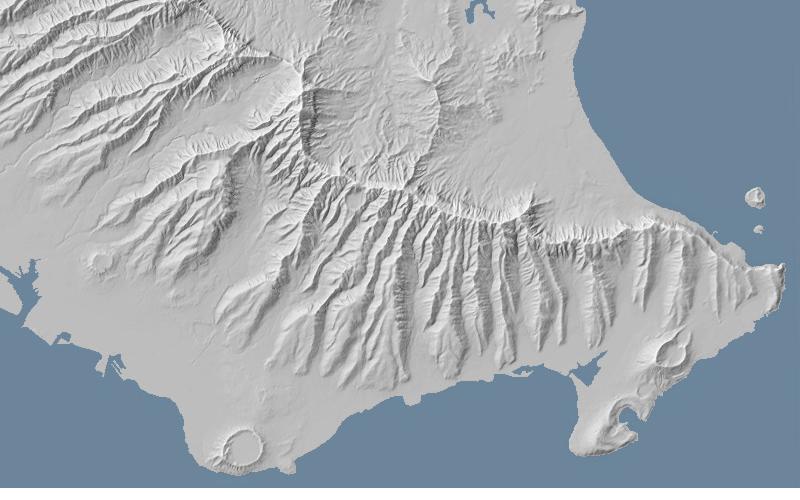
4) Other options include applying a "Curves" adjustment layer to the texture shading layer or an overall "Levels" adjustment to lighten or darken the entire image. Every terrain is different and a certain amount of experimentation is required to get the best results. Examine the linked file below to get an idea of how this is done.

Layered Photoshop file with combined shaded relief and texture shading (1.4 MB).

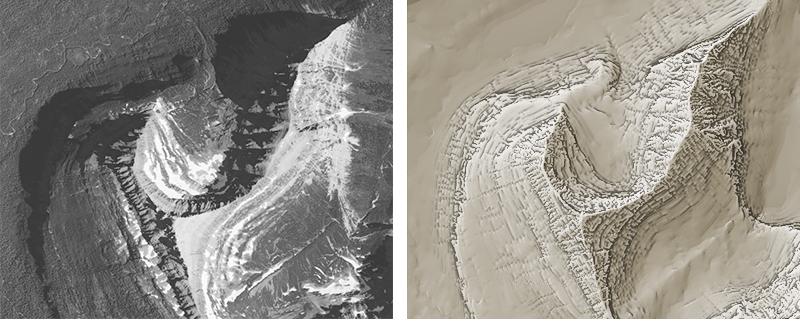
5) Finally, the procedure above will create a gray composite relief in RGB color mode, which can look sterile and metallic. Use a "Hue/Saturation" adjustment layer to tint the relief a more attractive color.

line2b

Rock Textures

The TTS application offers an automated method to create textures that resemble the hand-drawn rock hachures on Swiss topographic maps (examples). Clean, high-resolution elevation data of some mountain landscapes can yield highly accurate rock textures (Figure 4).

Update: Since developing this technique I have tried it with other DEMs from around the U.S. None of these results have equaled the quality shown below. The technique seems to work best on landscapes with craggy peaks rising above gently sloping valleys.

rockhachures

Figure 4. (left) Aerial photograph of Citadel Mountain, Montana. (right) The mountain depicted with gray rock texture combined with beige shaded relief.

To create rock textures follow these steps.

1) Render and save a shaded relief image of your area of interest.

2) Render and save a slope mask of the same area identical in size to the shaded relief. To render a slope mask in Natural Scene Designer Pro, render a shaded relief with the light angle at 90 degrees, a 15 percent gray palette, and the shading amount at 400 percent.

3) The slope rendering will depict steep slopes as dark gray and flat areas as light gray. In Photoshop, Invert (Image/Adjustments/Invert) the image so that the steep slopes are lighter. You will use the inverted slope image as a Photoshop layer mask in step 6.

4) In TTS, render a texture shading of the same area. Set the top slider at 200 and the bottom slider at -2. The rendering will look rather ugly. Save it.

5) In Photoshop, paste the texture shading on a layer above the shaded relief. Change the blending mode of the layer from "Normal" to "Hard Light."

6) Add a layer mask on the texture shading layer (click the "add layer mask" icon at the bottom of the layers palette). Option-click the layer mask and paste the slope mask into it.

7) If necessary, apply a "Curves" adjustment to the layer mask to confine the rock texture only to the steepest slopes.

8) Adjust the opacity of the texture shading layer and experiment with other blending modes to alter how the rock textures interact with the shaded relief. You can experiment with the linked file below.

Layered Photoshop file with rock textures and shaded relief (15.6 MB).

line2

Gallery – Monochromatic relief art enhanced with texture shading

acadia

Jordan Pond area, Acadia National Park, Maine.

easternus

Eastern United States

glacier

Glacier National Park, Montana. Logan Pass is at the center of the image.

oahu

Koʻolau Range, Oʻahu, Hawaii

matanuskaglacier

Matanuska Glacier terminus, Alaska

shasta

Mount Shasta, California

zion

Zion Canyon, Utah

iceland

Iceland

line2a

Final thought...

D

3D oblique scenes also benefit from texture shading. (left) Glacier National Park without texture shading. (right) The same scene enhanced with rock textures.

Return to ShadedRelief.com