Making 3D Terrain Maps |
||||||||||
--Pseudo-Perspective Maps |
||||||||||
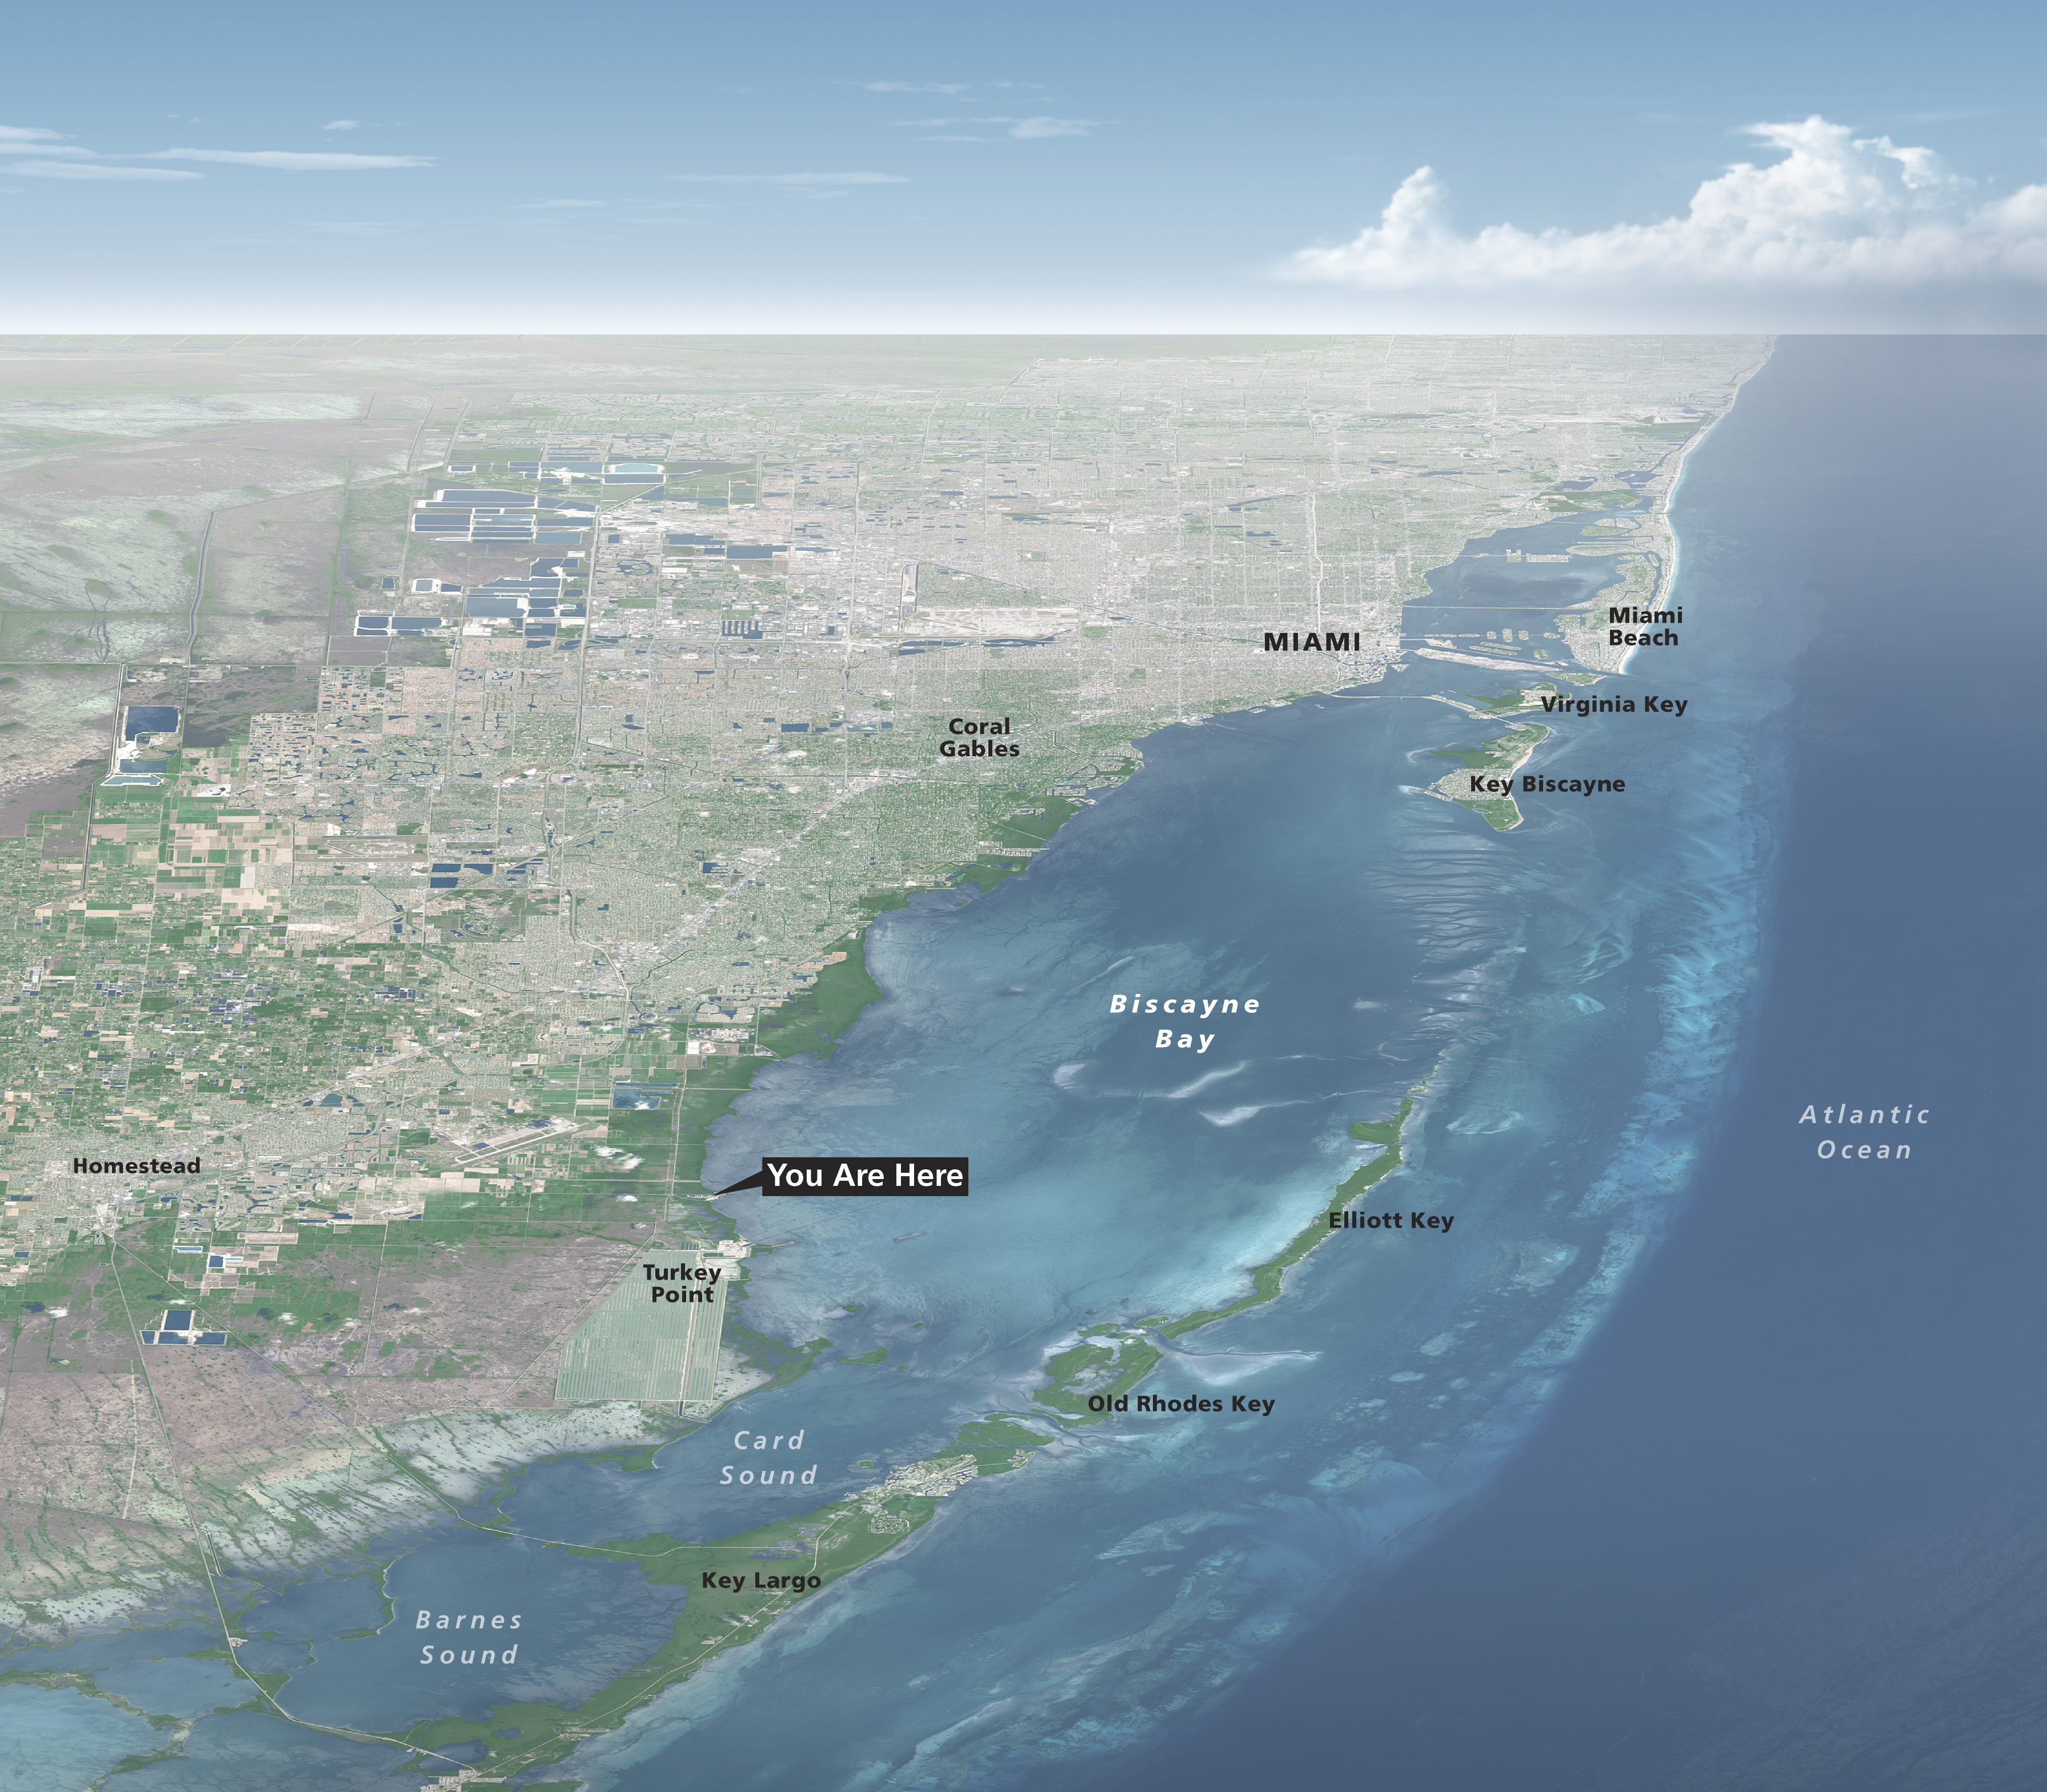
Using only Photoshop, and with a good satellite image or aerial photograph, you can create pseudo-perspective maps that look much like oblique scenes rendered in 3D terrain software. But pseudo-perspective maps have a major drawback: they are not 3D. Because satellite images and aerial photographs taken from directly overhead lack three-dimensionality, the pseudo-perspective maps you make from them will also be flat. I recommend the technique for places with little or no terrain, such as south Florida. For example, the pseudo-perspective map of Biscayne National Park (shown below) derives from a color-corrected Landsat 8 image at 15-meter resolution. I manipulated the Landsat image to simulate the optical perspective that you would expect to see when flying low over the area. To complete the scene, I added atmospheric haze, sky, and a puffy cloud using techniques described on previous pages. |
||||||||||
 |
||||||||||
Biscayne National Park, Florida. (Click map to enlarge.) |
||||||||||
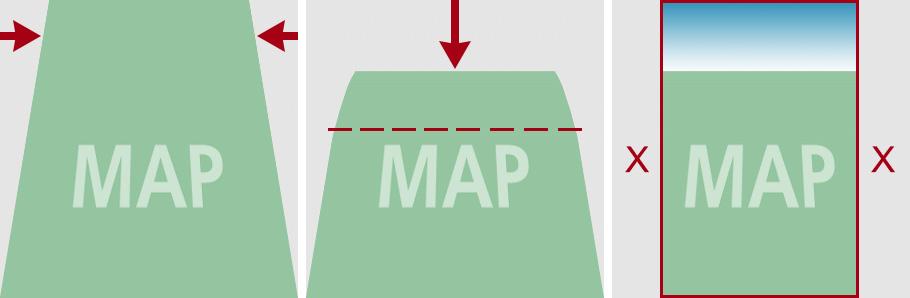
Photoshop procedure 1) Rotate the satellite image (or aerial photograph) in the direction that you want to view the perspective map. Make sure that the foreground is at the bottom and background is at the top. The top edge of the image must be horizontal and perpendicular to the viewing direction, so you may need to crop it. 2) Use the Transform command (Edit/Transform/Perspective) to narrow the image background (see illustration below, left). The more you pinch the background, the more exaggerated the perspective effect will be. 3) Next, you will compress the image background to create the illusion of background depth (illustration below, middle). Marquee select the top one third of the satellite image. Use the Transform command (Select/Transform Selection) to move the top edge of the selection down. To gradually increase the amount of compression toward the back of the image, repeat this process, each time with smaller background selection. For example, next compress the top 25 percent of the satellite image, then the top 10 percent, and so on. 4) Use the Crop tool to trim the image margins (illustration below, right). The pseudo-perspective map is now ready for you to add a nice sky. |
||||||||||
 |
||||||||||
Pinching in (left), squeezing down (middle), and cropping away (right) to create a pseudo-perspective map. |
||||||||||
Comments • Pinching in the background of a satellite image diminishes its area leaving blank spaces on the sides, which can interfere with cropping. To avoid this, make sure that the satellite image background covers more territory than what you actually need. • For a tutorial on how to prepare natural-color Landsat 8 images in Photoshop, go here. • You can create pseudo-perspective maps from rasterized vector maps. Note that placename labels will distort along with the rest of your map, which could look okay. Or you have the option of rasterizing the map without the labels. |
||||||||||
 |
||||||||||
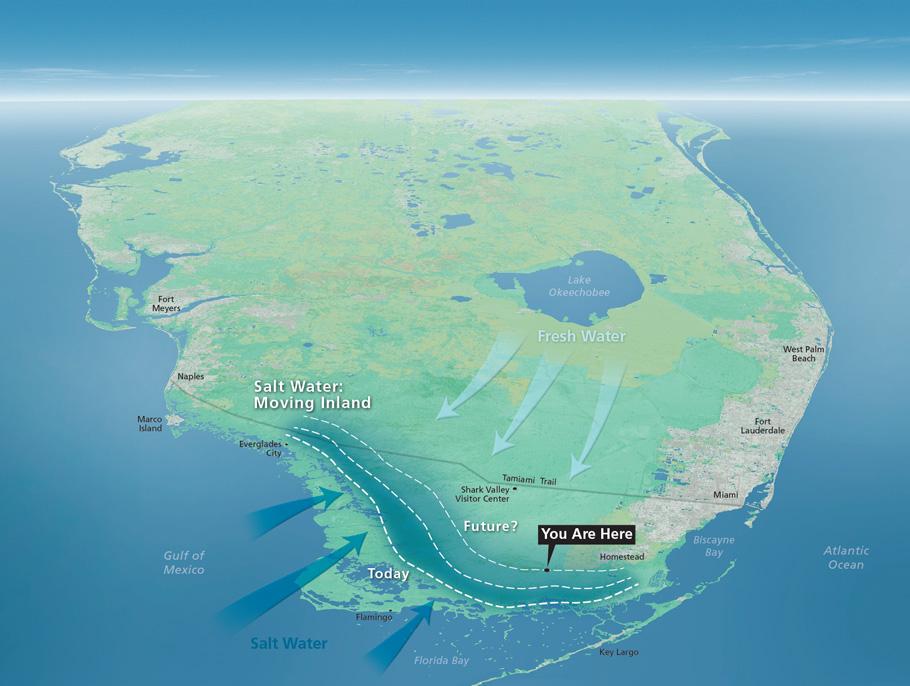
A pseudo-perspective map of southern Florida created from 100-meter Natural Earth data. Given the small map scale, the flat horizon should ideally have slight curvature, the topic of the next section. |
||||||||||
 |
||||||||||