Making 3D Terrain Maps |
||||||||||||
--Multiple Lights |
||||||||||||
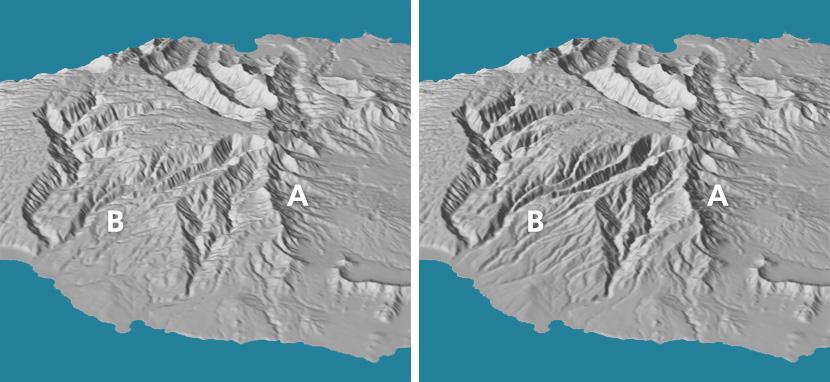
With some scenes, regardless of what light direction you select, the terrain will not look as good as it should. A classic example is the island of Kauai, Hawaii, (see illustration below) which has spoke-like ridges radiating out from a central summit. The map on the left has light coming from the southwest (lower right). The main north-south ridge indicated by "A" is easy to discern. More difficult to see are the ridges close to "B" because they trend parallel to the light direction. The map on the right addresses this problem with Multiple Lights applied in Natural Scene Designer Pro. By adding additional lights and adjusting their direction for limited areas on the terrain, the ridges at "B" are easier to see. |
||||||||||||
 |
||||||||||||
Kauai, Hawaii, before (left) and after (right) multiple light adjustments. |
||||||||||||
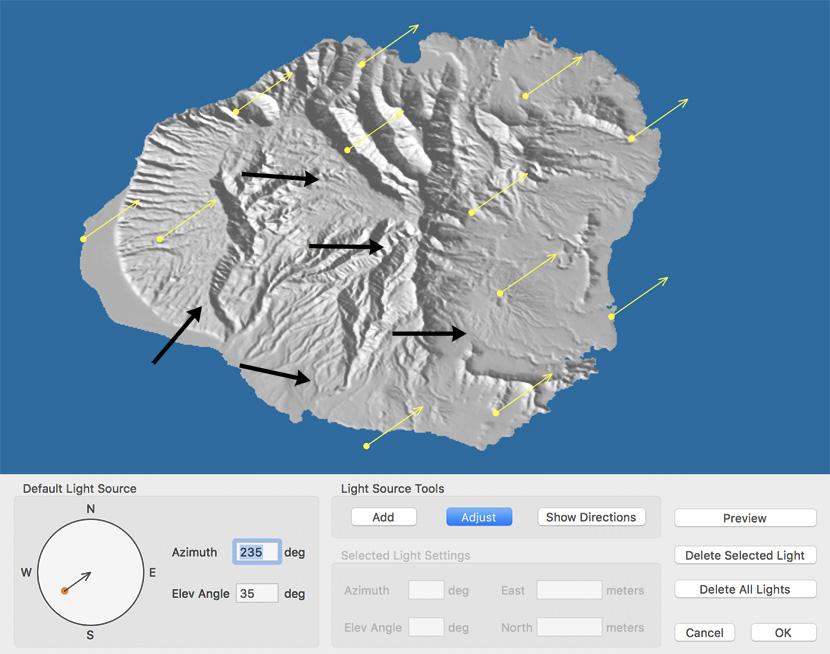
The illustration shows the Multiple Lights window in Natural Scene Designer Pro. Yellow arrows indicate light coming from the default direction, southwest in this case. The black arrows are manual adjustments to the light direction. To adjust a light, press the adjust button and then select a light. Click-drag the arrow to move it. Click-drag the tip to rotate the azimuth. Dragging the tip forward or backwards lowers or raises the elevation angle. Tip: changing the elevation angle will lighten or darken the relief around the light, a result that you may not want. Holding down the shift key when rotating an arrow will prevent the elevation angle from changing. You can add as many lights as you want to a relief. Each new light influences its immediate surroundings. The software interpolates the influence of multiple lights in the areas between lights. Clicking the "Show Directions" button and moving your cursor over the relief reveals interpolated light directions everywhere. |
||||||||||||
 |
||||||||||||
Adjusted multiple lights (indicated by black arrows) in Natural Scene Designer Pro. |
||||||||||||
 |
||||||||||||