Making 3D Terrain Maps |
||||||||||
--Curved Horizons |
||||||||||
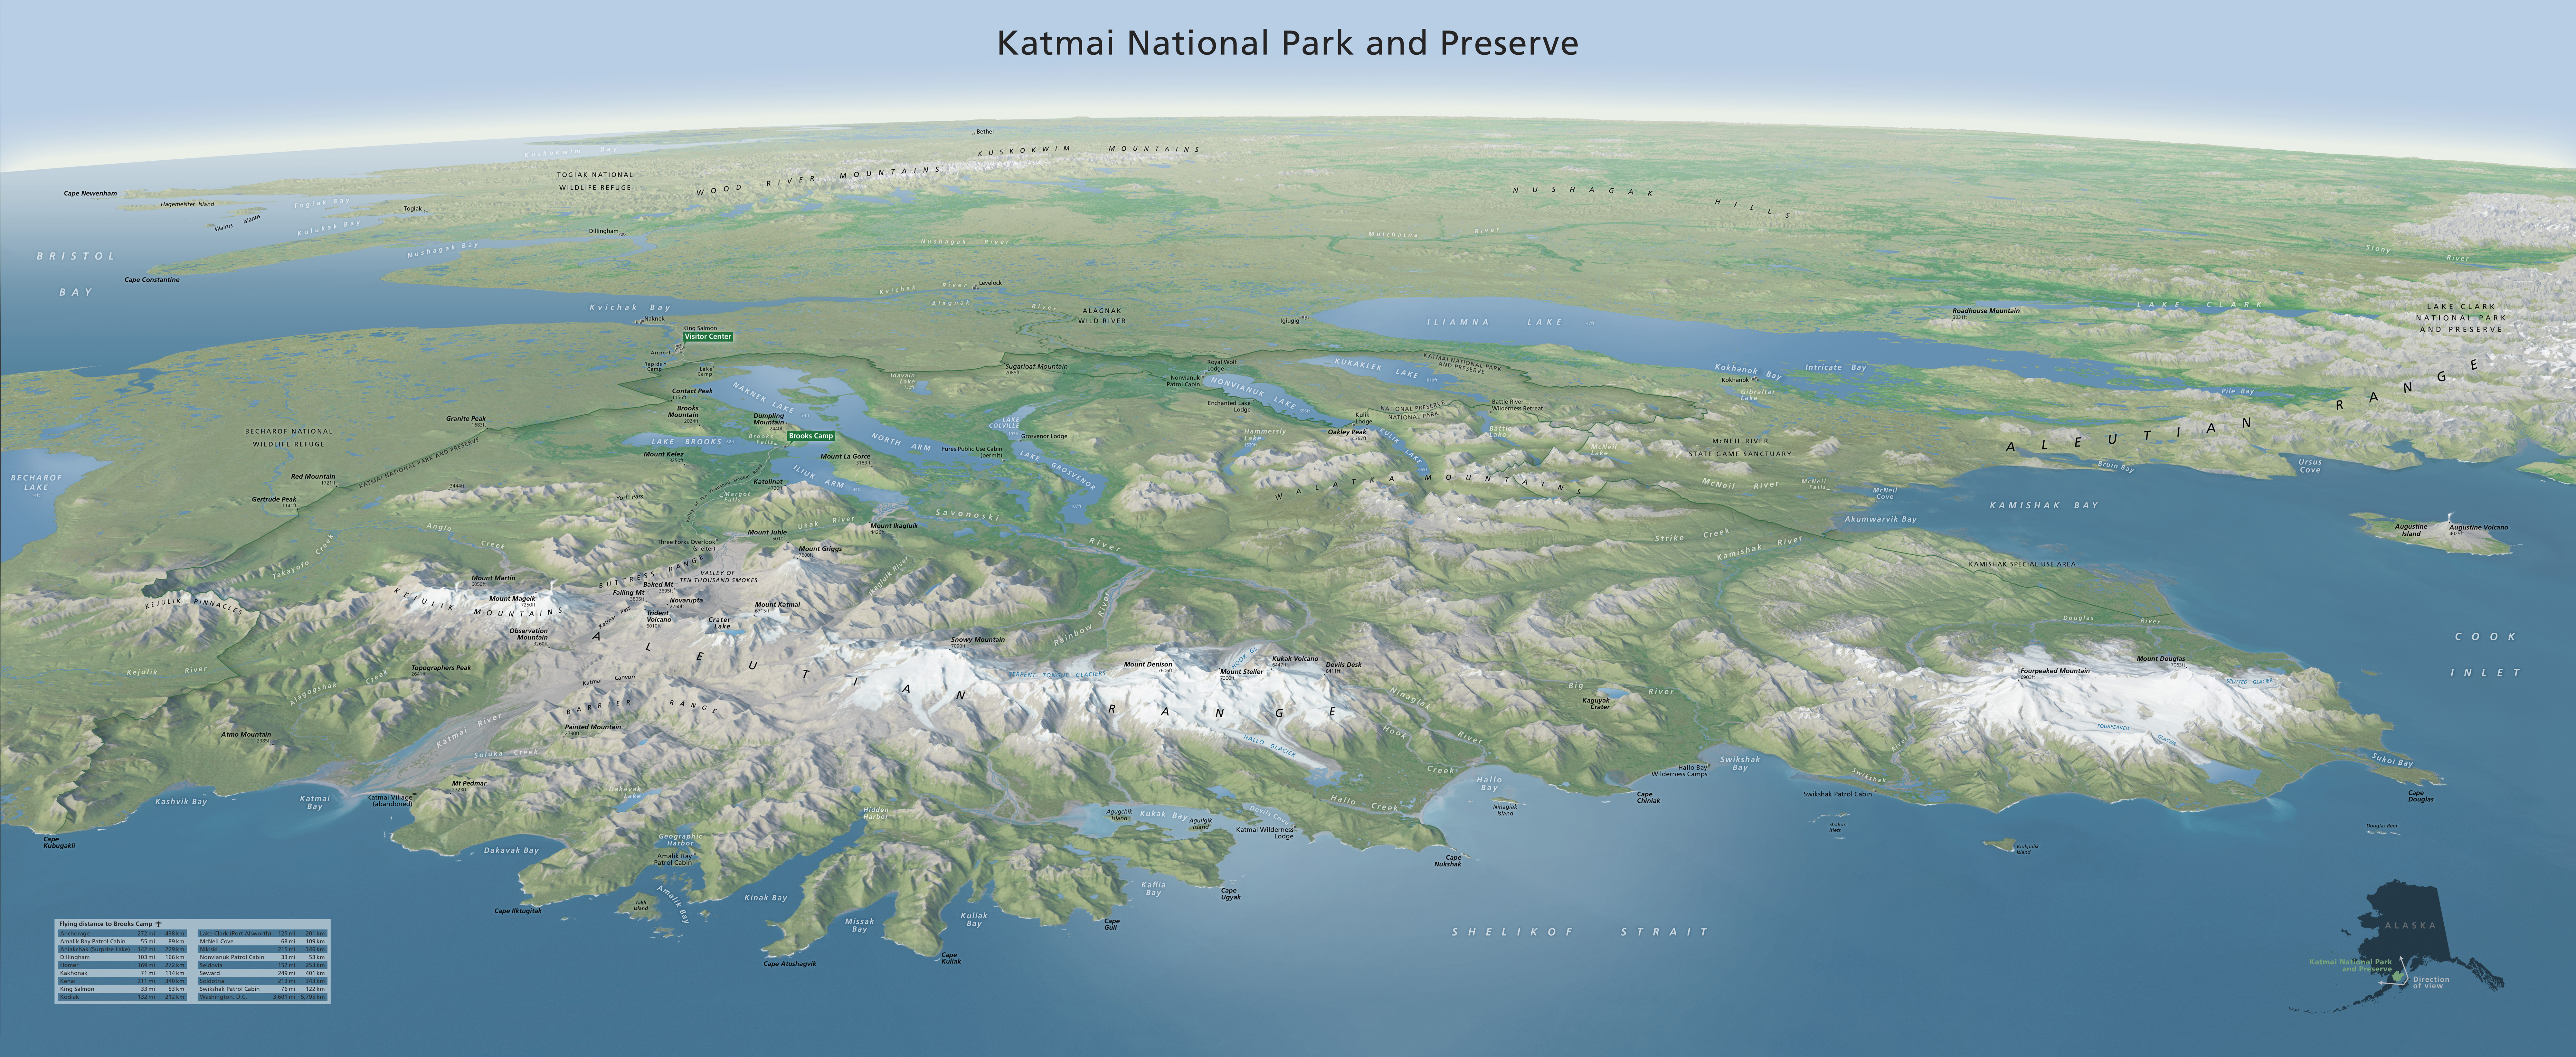
Natural Scene Designer Pro by default renders 3D terrain maps as if the Earth were a flat plane from which mountains and other terrain features protrude. Rendering terrain as a plane works very well at large map scales where Earth's gradual curvature—eleven centimeters per kilometer (8 inches per mile)—is not noticeable. At small map scales, however, when the horizon stretches across thousands of kilometers, depicting Earth's curvature lends greater authenticity and interest to your scene. Including a curved horizon also suggests the large size or global importance of your area of interest. For example, the curved horizon on the map below emphasizes the vastness of Alaska. Katmai National Park and Preserve, situated on the coast in the foreground, spans 160 kilometers (100 miles) from end to end. |
||||||||||
 |
||||||||||
Katmai National Park and Preserve, Alaska, created by Jim Eynard and Joe Milbrath. The Brooks Range is faintly visible on the horizon 1,000 kilometers (620 miles) to the north. (Click map to enlarge.) |
||||||||||
I will discuss three techniques for creating 3D terrain maps with curved horizons. Spherical rendering in Natural Scene Designer Pro This technique is the easiest to do and produces horizon curvature that accurately reflects Earth's spherical form. In Natural Scene Designer Pro, after importing your elevation data, go to the World tab in the Settings panel and change the Earth Model from Plane to Sphere. To use the Sphere Earth model, Natural Scene Designer Pro requires that terrain data be in the Geographic Projection. If you are using some other projection, the program will ask if you want to reproject the terrain. Click okay. That's it. Natural Scene Designer Pro will now render your terrain with a curved horizon. The Katmai scene (shown above) is an example of this technique. Tips 1) To include a curved horizon in your scene, you will need a very large terrain model that covers the entire background, all the way to the horizon. This can result in very large file sizes especially when you need to show detailed terrain in the foreground. The DEM will also contain high-resolution data even in the background. One partial solution is to use a telephoto camera lens (90 mm and greater). This narrows the scene focus and eliminates the need for extra terrain data in peripheral areas. Another solution is to duplicate your NSD file containing high-resolution terrain data (only where needed in the foreground) and swap in low-resolution terrain data that covers the entire scene, including the background. Render both files at the same size and then merge them in Photoshop. By using layer masks, you can show the high-resolution terrain only in the foreground and the low-resolution terrain in the background. Readers will not notice that you used low-resolution terrain data in the highly compressed areas near the horizon. 2) The problem described above also applies to satellite images draped on a terrain since you would need many large, high-resolution satellite images to cover an entire scene. One solution: use a substitute low-resolution image to cover the background making sure that the colors match the high-resolution image in the foreground. Alternatively, I sometimes render terrain in the background with hypsometric tints that mimic the color found in the foreground satellite image. The addition of background haze will disguise this cheating when you merge the two rendered scenes in Photoshop. 3) The camera lens has a dramatic effect on the amount of horizon curvature. For example, the default 35mm lens results in scenes with exaggerated horizon curvature. For a subtler horizon curvature, I suggest using an extremely telephoto lens, up to 200 mm. 4) Spherical rendering takes longer than planar rendering to complete. Have patience. Shear filter in Photoshop I originally rendered the Kenai Fjords scene shown below with a flat horizon, but afterwards decided that slight curvature was appropriate given the expansiveness of the scene. The next technique looks at how to create fake horizon curvature using Photoshop's shear filter. |
||||||||||
 |
||||||||||
Kenai Fjords National Park, Alaska. (Click map to enlarge.) |
||||||||||
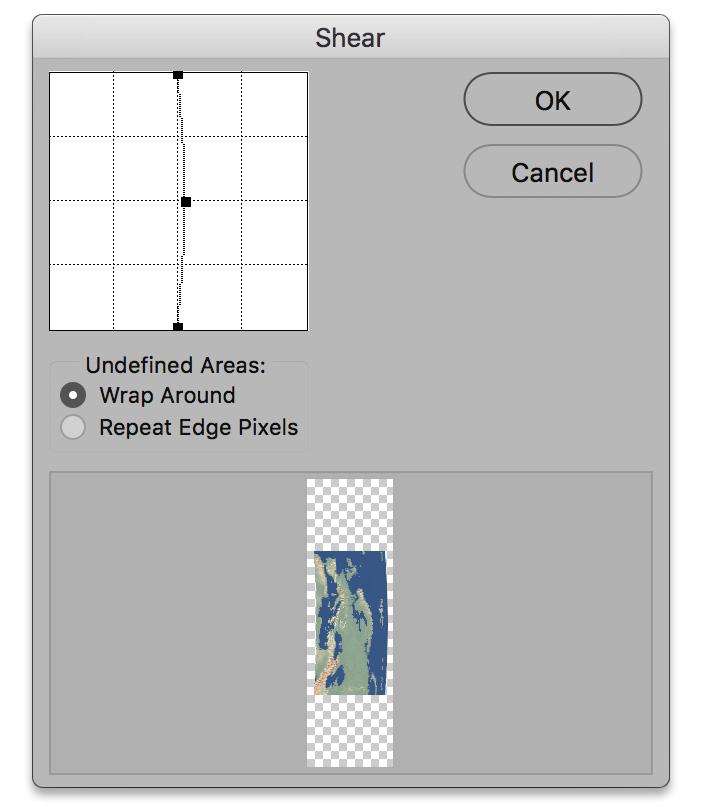
Procedure 1) In Photoshop, open a rendered 3D scene with a flat horizon. 2) Rotate the scene 90 degrees clockwise so that the horizon is on the right side (Image/Image Rotation/90º Clockwise). 3) Open the Shear filter (Filter/Distort/Shear). In the little diagram at the top, move the middle black square to the right staying on the center grid line (see screenshot below). You only have to move the black square a slight amount to bend the entire scene, including the horizon. 4) To finish, rotate your scene 90 degrees counter clockwise to put the horizon back at the top where it belongs. |
||||||||||
 |
||||||||||
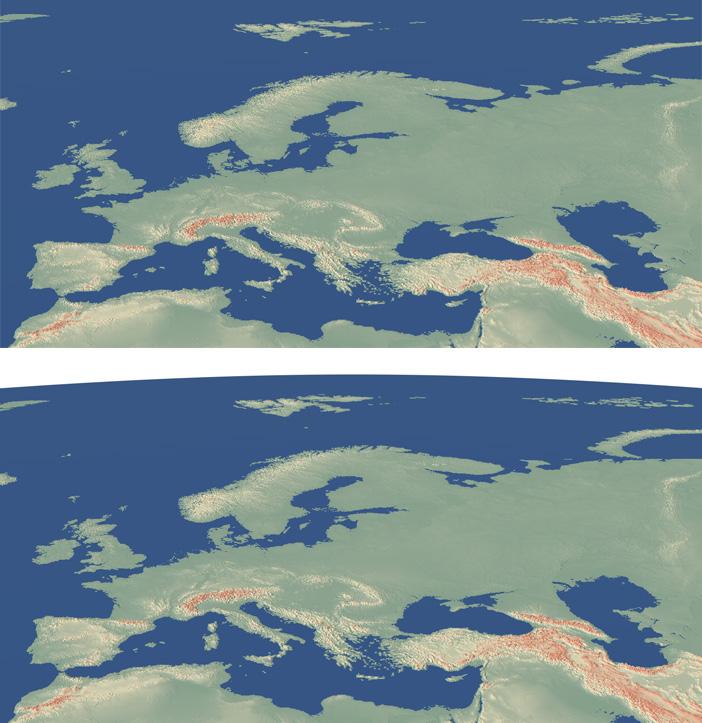
Using the Shear filter in Photoshop to add horizon curvature to a 3D terrain map of Europe. Note the empty image area around the map. |
||||||||||
Tips 1) The Shear filter is a coarse tool. You may find that pulling the black square to the right by the smallest amount possible bends your scene too much. To get around this limitation, use Canvas Size (Image/Canvas Size) to add empty image area to the sides of your scene (see example above). I typically add 200 or 400 percent canvas size depending on how much horizon curvature I need. Increasing the Canvas Size by 400 percent allows subtler horizon curvature. When finished, you will need to crop empty image area. 2) I also Canvas Size to give a little extra padding to the top of the scene. This allows me to better gauge horizon curvature when using the Shear filter. 3) The Shear filter is good for adding only a slight amount of horizon curvature. Pulling the black square too much to the right will distort the horizon arc. 4) The Shear filter bends all areas of your image, including the foreground. To depict the foreground without bending, I use the Shear filter on a copy of my original scene and then merge the two versions in Photoshop so that the bending is visible only near the horizon (see example below). |
||||||||||
 |
||||||||||
A 3D terrain map of Europe before Photoshop horizon shearing (top) and after (bottom). |
||||||||||
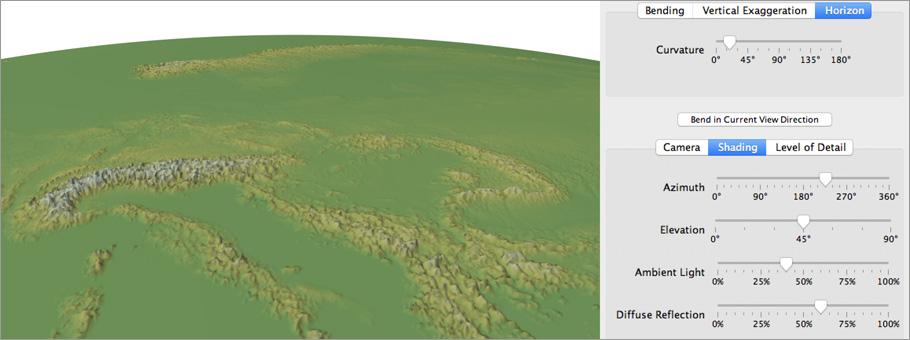
Horizon Curvature in Terrain Bender Terrain Bender freeware can warp terrain data to create curved horizons. In Natural Scene Designer Pro, export your terrain as an ASCII Grid DEM. Open it in Terrain Bender. Go to the Horizon tab (see screenshot below) to apply the amount of horizon curvature that you think looks right. Save the bent terrain model from Terrain Bender, open it in Natural Scene Designer Pro, position the camera, set the lighting, and render your final scene. |
||||||||||
 |
||||||||||
An ASCII Grid DEM of Europe with horizon curvature applied in Terrain Bender. |
||||||||||
 |
||||||||||